Followers

Tuesday, March 1, 2011

The circle of life...

Life can be so strange.
Yesterday I was talking about babies and today I needed to make a sympathy card. One of my sons teachers just lost her Dad to leukemia. She was definitely "Daddy's Girl" and I thought this image called "My Sweet Lili" by Sarah Kay would be perfect.
I used warm gray Copics to color the image in a monochromatic scheme and added just a touch of pink to Lili's cheeks.
I wanted to add a bit of embellishment without taking away from the main image, so I decided to go with a black jewel flourish.
And finished it off with a rub on sentiment and some piercing along the border.
I guess you just never know what each day will bring, so make the most of it and go give those loved ones a squeeze.

Monday, February 28, 2011

Whoa Baby!

I'm surrounded by pregnant women! There must be something in the water out here, because everywhere I look these days, I see baby bumps. I totally have baby fever now, and figured I'd put all of those feelings to good use and make some cards for all of the new arrivals that will be coming soon. I made this one just in time, because my good friend just became a Grandma four days ago! I used a super cute elephant image by InStyle Stamps. The elephant is actually part of a scene, and I just cut it out. I embellished with some jewels, okay a lot of jewels, and a ric-rac border punch. The sentiment is actually a printed playing card that I thought worked well with the rest of the card.
Thanks for stopping by today.
If you're a fan of CSAYL, you can hop on over there for a quick post about the challenges for this year.

Thursday, February 24, 2011

Pink Cat Digital Release Day

How do you spell cute?

G-N-O-M-E-S!

Today I'd like to introduce you to the Pink Cat Studio gnome family! With the release of the new movie "Gnomeo & Juliet", these cuties couldn't have come at a better time. Along with our owl fettish, the kids and I have a bit of a thing for gnomes too.

This is Lulibell and her little forest friends... I picked up some fantastic papers by American Crafts to go with the images this week. The colorful woodgrains and retro patterns in the "Campy Trails " collection were so fun to work with.


Here are the proud parents, Ninbert and Gladibell

I used a giant clothespin to make a quick photo holder. After the hubs painted it white for me, I attached some patterned paper and embellished a little.


Here's Gladibell again, but this time she's on a birthday tag that's ready to attach to a gift bag.

She's adorable, no?

These flowers were so simple to make and really make this tag POP.
I made four strips of patterned paper, rolled up the edges and glued a button in the middle.


And now you finally get to meet Finnbert.
He's Lulibell's brother.

These are gift card holders. Each year during Spring Break, we plant our vegetable garden. The kids have so much deciding which kind of things we should grow, so this year I got them gift cards to the nursery, so they can pick out everything themselves. These are SO simple to make - 3 minutes tops! You can check out a tutorial I did for these right here.

The family image was perfect for address labels!

ACK! I love them!
I even printed up some extra sheets of labels for my kids to color.

For my last project today, I used Ninbert.


I popped up his hat, eyebrows and right arm with dimensionals.I don't have alot of "guy" cards in my stash, so Ninbert gave me the perfect opportunity to whip up a masculine birthday card. I just love him :-)

I really can't wait to see what the rest of the team came up with! You can hop on over to the PCS blog to check out all of the samples and then hop on over to the PCS digi shop to grab these sweeties for yourself. Don't forget that you'll get a FREE mushroom house image with ANY purchase - today only!


Tuesday, February 22, 2011

Sew cute!

Don't you just love getting new stamping goodies in the mail?! I just got a boatload of new stuff from the Stampin Up mini catalog. Oh my gosh.....did you fall in love with all of the sewing themed items too?
Seriously....I bought all of it.
Let's just keep that between us though, okay?

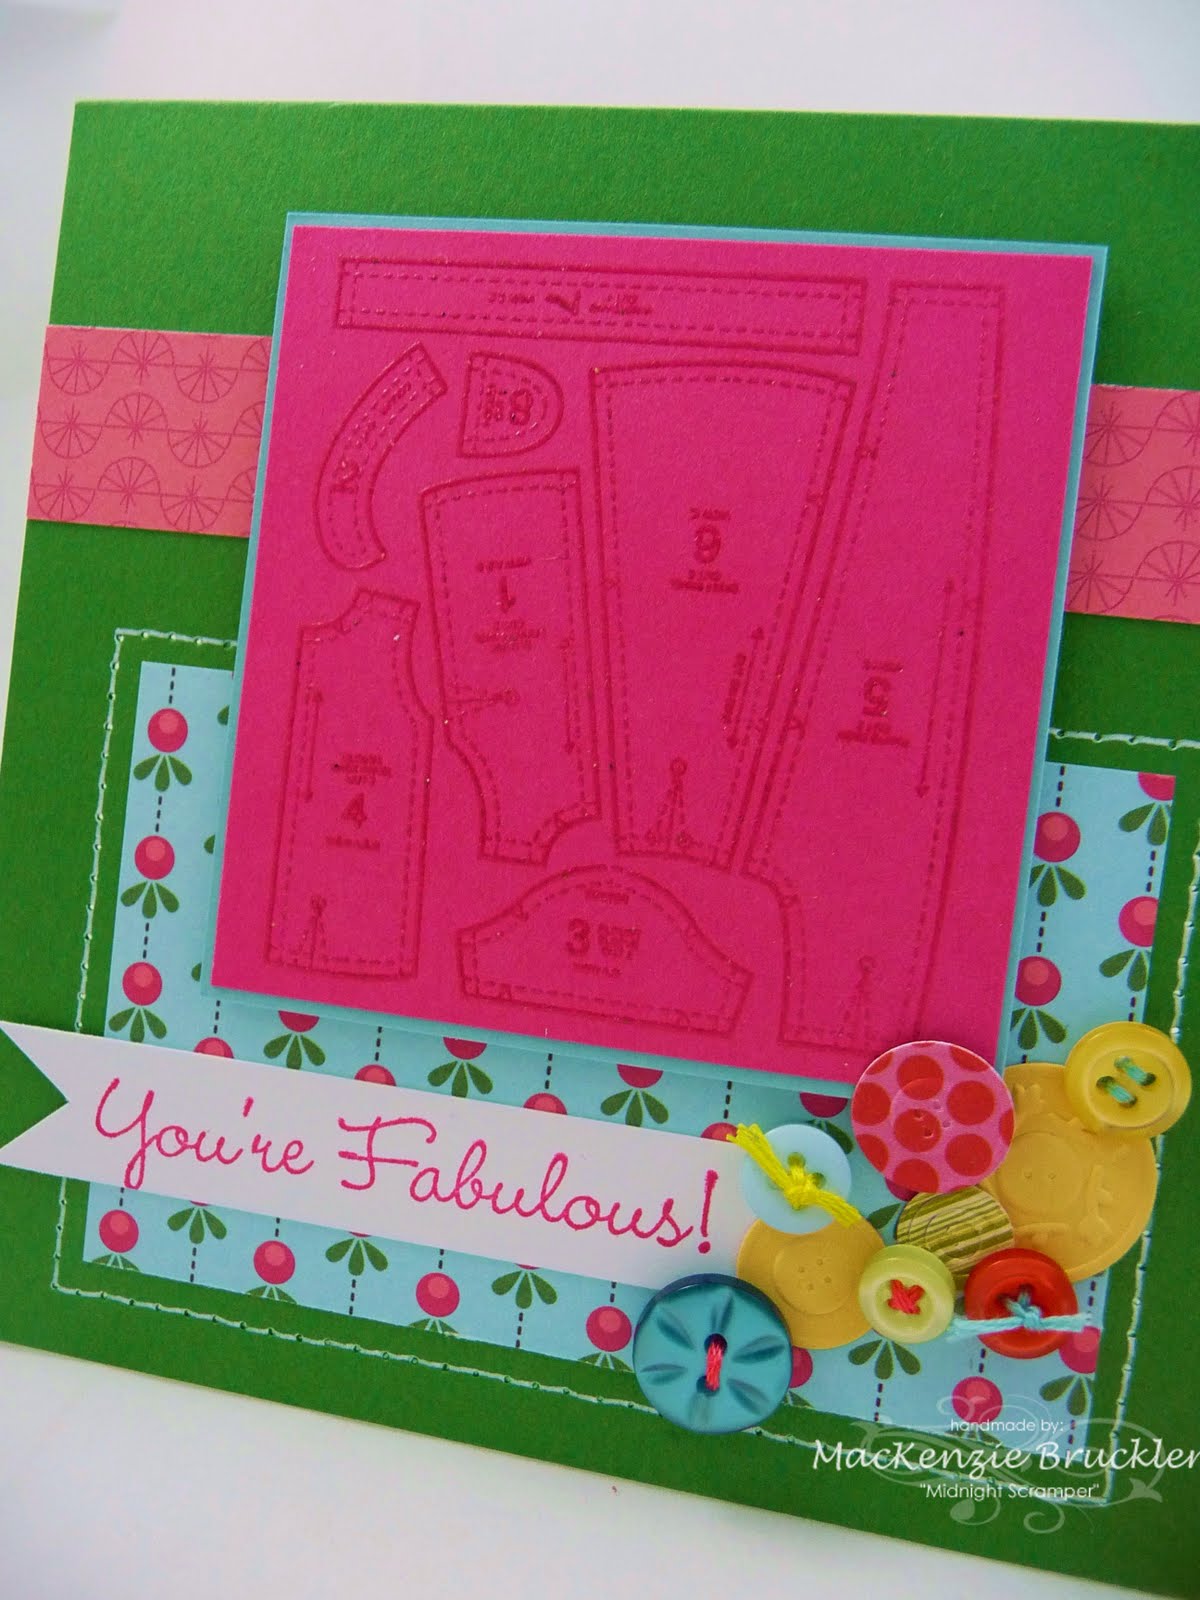
Of course I had to ink something up right away! I inked up this image called "Pattern Pieces" with Versamark and clear embossed it on Melon Mambo cardstock. I used a couple of patterns from the new pack called "Sweet Stitches" and paired it up with some Garden Green cardstock.
I pierced around the edge of the bottom panel and used a white gel pen to create some faux stitching. I finally found a white pen that works PERFECTLY! I've tried so many and finally found the best one out there. It's the White Gelly Roll pen by Sakura - love it!! I went back and bought two more, just to have in my stash. I'm so sick of white pens clogging and not being reliable. Seriously...go get one of these.

Okay, okay...enough about the pen. I finished off this fun card with some real buttons and some buttons I cut with the new SU button Sizzix die. The sentiment is from an old SU set called "Bubble Queen", remember her?! My mother-in-law is an amazing seamstress, so this is going to be her Mother's Day card - if I can hold off giving to her until May! Well, I guess I'm out of exclamation points for today, so that's it for me :-)
Thanks for peeking.

Monday, February 21, 2011

It's Official...

I literally have a stamp for just about everything. We came home last week to a giant box on our doorstep. Inside were the most beautiful chocolate covered strawberries from Sherri's Berries! My Aunt and Uncle are the best! I tell ya....getting spoiled just never gets old!For our thank you card, I whipped out an oldie but a goodie from Stampin Up called, "Oh So Sweet". I used three different inks for all of the strawberry parts and then popped up the chocolate layer on dimensionals. It was looking a little dull, so I added some Stickles for a bit of sparkle and finished it off with some of my favorite polka dot ribbon.
The kiddos and I have a whole week to spend together. I'm soooo looking forward to sleeping in every morning, taking them to the farmer's market and enjoying the beautiful weather. Thanks for stopping by!
{{{hugs}}}

Thursday, February 17, 2011

Pink Cat Digital Release Day!

Could it get any cuter than this?! Lily as Rapunzel = adorable!

While perusing my paper stash, waiting for inspiration to whack me in the head, I stumbled upon some glittery patterned paper with Rapunzel's hair on it! Why do I have this and where did I get it?!

I started out with this hideous frame I picked up at Target for fifty cents.
A little fancy paper, some Mod Podge, some cute images to work with, and I ended up with this fun addition to any little girls room.
I told you I had Rapunzel's hair paper!
And here's Billy coming to rescue his princess.
I added some felt leaves and paper roses for a pop of color and texture.
I accented parts of the image with a glitter pen and popped it up on dimensionals.

Adorable, no?
Hop on over to the PCS store today and you'll get yourself a FREE digital image with any purchase!

Wednesday, February 16, 2011

Meet Steph

This is Steph.
Isn't she cute?

As soon as I saw this image, I had to have it. So sweet, so girly.
You can find her over at InStyle Stamps, along with lots of other great images.

This was a really quick card to put together, so I thought I'd show you how I did it. The first thing I did was choose what papers I wanted to work with. I found a great pattern from the "Hopscotch" collection by BasicGrey and paired it up with a fun polka dot cardstock by BoBunny. I decided to use a pink base to pull off the girly look that I was going for. Then I colored my image to match with Copic markers.The next step was choosing a layout. This is usually the most time consuming part for me. Once I picked something that I was happy with, I cut my papers. For this card I cut a 3.5" circle and a 4" x 5" rectangle. Then I adhered them to the card with the rectangle overlapping the circle.I added the image panel on top and popped up the phone and part of Steph's hair with dimensionals. Don't ya just love pop dots?! Next up was some embellishing to finish it off.
Voila! Girly card completed!
Thanks for stopping by to peek at my project today. I'll be back tomorrow with something fit for a princess.