Followers

Monday, March 31, 2008

April Workshop project #1

8 x 8 page 12 x 12 page

I teach a 3 project class on the first Sunday of every month and as of right now, it looks like I may have up to 21 people attending this weekend! I see a new table from Costco in my immediate future.....

For one of the projects this month, the gals wanted to try a scrapbook page with bright colors. Some of them will be doing a 12 x 12 and some will be doing an 8 x 8. These were made with Certainly Celery, Bashful Blue ,the "Jersey Shore" pattern paper and some of the stickers from an old SU hostess pack called "Creative License". I don't have the new star punch yet, so I used my Cricut to do the star embellishments and lettering and then took coordinating SU markers to do some doodling on them.
I'll be sharing the other two projects this week, so be sure to check back.

Saturday, March 29, 2008

I decided to play along


and participate in Amy's Friday sketch. I had a house full of kids today, but needed to get a thank you card made and in the mail. Amy's sketch was perfect because it was such a quick and simple layout that I was able to pull together between snack time and mood swings. I'm not kidding......

I used the single flower from "Embrace Life" and colored it in with my prismacolors. I cut one out and put it on dimensionals and added stickles to all three. I used the French Script background and the sentiment is from an SU hostess set from the last catalog - the name escapes me right now. When I was done, it looked like it was missing "something", so I added some ribbon and a photo corner.

Thanks for checking in - hope you all have a great weekend! I'm hoping to have some scrapbook pages to share with you on Monday.

Friday, March 28, 2008

Thanks, we had a blast!


I'm a big fan of Thank You cards. I feel that if someone takes the time to pick out a gift or do something thoughtful, the least I can do is pop a thank you card in the mail to let them know that it was appreciated. I can't sleep if I haven't sent someone a thank you note within a few days. I know, I know, it's a sickness. But hey, it could be worse right?!

I've taught my children the importance of Thank You notes as well. Sometimes they make the cards and sometimes they just fill in a card that I make. This time, I wanted to play with my rocket from SU "Pun Fun" set, so I made a few cards while the kids were sleeping and they were all ready to be filled out the next morning.

I thought the rocket would be perfect for a "kid" thank you card. I decided to go with an orange, blue and green color combo. I used bright orange textured cardstock for the base and some miscellaneous scraps that I had in my drawer. I colored the main image with my Copics, added some Stickles and a bright green eyelet in the middle of the rocket. And low and behold I was finally able to use that obnoxious ribbon I got in the $1 bin at Michael's!! See - I knew I bought for a reason!

Tuesday, March 25, 2008

Pier 1 Inspiration


One of my favorite bloggers does a weekly challenge, and this is the first time I've been able to participate. It worked out perfectly because I was planning on making some thank you cards this evening anyways.
Each week Kristina posts a photo and an SU color combination that matches it. The photo above is from the Pier 1 website. The colors that we had to use were Orchid Opulence, Rose Red, Pumpkin Pie, Basic Black & Whisper White. For some reason, I REALLY don't like Rose Red, but was able to scrounge up a little of it from my scrap drawer. This is my entry for the week 3 challenge.


I used an old set from a 2006 mini catalog called "Pattern Of Friendship". I was really on the fence about purchasing this set, but decided to go ahead and get it just in case it wasn't added into the big catty. I'm so glad that I did, because I've used it over and over and it is definitely one of my favorite SU sets. The background on the purple, ehem...I mean Orchid Opulence, was done with the "Doodle This" set and I did a little bit of piercing on two edges of the main image. The dresses are paper pieced in Rose Red and a beautiful orange pattern paper that is made by Bo Bunny. I used my round tab punch to make a spool and wrapped it with some orange thread and a pin. What else am I going to do with orange thread?? Why do I even have orange thread??

Here kitty, kitty...


I'm in a stamp club that meets once a month for a swap and this is one of the cards I received from one of the many talented ladies in our group. Isn't this card adorable?! She used the SU set "Here kitty, kitty" and I absolutely LOVE how she wrapped the yarn around the cut out image of the cat. Great job Katrina! Can't wait to see what you come up with for next month - no pressure right??

Monday, March 24, 2008

RUN don't walk


to your nearest Costco if you've been wanting the Crop-A-Dile! While perusing the aisles a few days ago I stumbled upon this incredible deal! Normally the Crop-A-Dile sells for $30 by itself - at least everywhere I've seen it. Right now, Costco has a package with the Crop-A-Dile and 642 eyelets in three different sizes in a beautiful assortment of colors for $30! I tore open that baby as soon as I got it home - LOVE IT! My husband was even impressed with it *gasp*! It cuts through everything like "buttah".

Hope you all had a wonderful Easter weekend and are enjoying Spring Break. I'll have a new card to share with you tomorrow.

Friday, March 21, 2008

Pun Fun Birthday


Made this card for a friend who had a birthday - duh. I had the Pun Fun set substituted in my SU starter kit because I thought it was just so cute and covered many occasions. For this card, I used my copics and my large Marvy punches. I used a paper piercer around the scallop edge of the large black circle and outlined the holes with a white gel pen. It kind of makes it look like mini eyelets. I popped up the head with dimensionals and added some flower brads to the corners. That's it for me today. The kids are on Spring Break and we were playing in the yard all day and planting our new vegetable garden. I'm wiped out.
Have a wonderful Easter weekend!

Wednesday, March 19, 2008

Engagement Stress


My hairdresser is such a sweetheart. She recently got engaged and is now experiencing all of the good times and stress that comes with planning a wedding. Her family just threw a big engagement party for her and she's a little worried about all the thank you cards that she needs to get out.

I decided to surprise her with a big pack of thank you notes that are ready to go. All she'll need to do is fill them out and pop em' in the mail. I used my SU Embrace Life set - which I am totally in love with.
Her wedding colors are coral and white, so I used Cameo Coral cardstock and white watercolor paper for the main image. I embellished the middle of the large flower with halfback pearls, which I thought added a little bit of elegance. I decorated the envelopes and packaged everything up in a clear box from Papertrey. The clear box was super easy to decorate. I just cut a long strip of the patterned paper that I used on the cards, cut a giant scallop circle and a white circle with my Marvy punches and sponged around the edges. What's the vegetable peeler for, you ask?? I use it to rough up the edges of my watercolor paper. Watercolor paper is alot thicker that SU whisper white, and I find that my old veggie peeler does the trick! I really like how these turned out and can't wait to surprise her with them tomorrow.

Tuesday, March 18, 2008

This must be what heaven looks like....


Okay girls....I bought 117 yards of ribbon today for $38!!! My friend Linda discovered a ribbon outlet store last week and I FINALLY had a chance to go this morning. The service left a little something to be desired - it took the lady an hour to cut my ribbon! It was like watching a turtle in slow motion. I'm SO lucky that my 4 year old was in a patient mood today!

Their prices ranged from 6 - 75 cents a yard! Almost all of my choices were 20 cents a yard. I now have a huge bag of beautiful ribbon that I'll be rolling tonight as I watch Big Brother & American Idol. Is it wrong that I want to lay it all over the floor and roll around in it??
This ribbon is very good quality and many of them would match well with SU colors. If enough people are interested, I would totally consider doing a ribbon share. I would figure out the exact cost of the ribbon plus shipping and post it here. If that's something that you'd like to do, please leave a comment here so I know how many people would like to do it.

Monday, March 17, 2008

Embossing on vellum


This is a card that I made at my monthly stamp club using an embossing technique on the backside of a stamped image on vellum. First we stamped the main image from the SAB "Merci" set onto a piece of vellum. Then we turned over the piece of vellum and used an embossing stylus to fill in the image. Just like you would do if you were coloring in the image, but here we used a stylus and made small circular motions to fill in the image. Interesting technique, however, it kind of makes the image "pop" up and a little difficult to adhere.

We had an intruder last night....


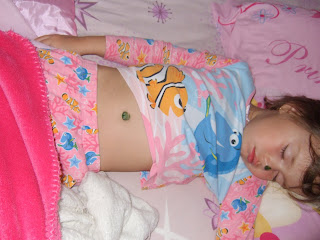
a leprechaun that is! This is the second year in a row that a sneaky little leprechaun has broken into our house and played tricks on my kids for St. Patricks Day! My son even set up a trap this year, but that tricky little leprechaun still got away! Once again, he painted the kids noses and belly buttons green while they were sleeping. Can you imagine??? Our big fat Siamese cat is green, the toilet water and even the soymilk in the fridge.


Happy St. Patty's Day everyone!

Thursday, March 13, 2008

Feelin' Springy


I've been in the backyard everyday this week doing yard work. I just love this beautiful Spring weather and got the "bug" to start planting, landscaping and getting our backyard ready to enjoy with our friends. For some reason I just LOVE doing yard work. Not planting flowers and stuff, but real hard work. Digging trenches, dragging bricks all over, etc. So far, I've brought 70 landscaping bricks that each weigh 25 pounds! Talk about a workout! I realized how hard I've been working when I got on the scale this afternoon and saw that I lost 4 pounds since last Thursday! Yeah for me!

I felt like making a "Springy" card this afternoon and of course I reached right for my "Harvest Moon" by Hambo. Don't you just love this image? I snicker every time I look at it. If you get a chance, you have to check out their latest spring arrivals. I've got my eye on the earthworm one! He's just too cute!

For this card I colored the main image with my Prismacolors and blended them with mineral spirits. I paper pieced the shirt and popped up the tushy with dimensionals. Oh, and don't ask me why, but I have a whole baggie of the fake grass looking stuff that you get with sushi and thought it looked really cute on this card.

That's it for me tonight. I'm off to watch Lost.

Wednesday, March 12, 2008

For a berry good friend


I just love this little guy from House Mouse. This is one of my favorite images to color. When I got my new Prismacolor pencils, this is one of the images that I "practiced" on.

For the card base, I used the Bazzill bling pink paper and Basicgrey's pattern paper from the Blush collection. I've had some pink magic mesh that I won in a raffle from the local scrapbook store. I've had a tough time using it, and thought it added a nice layer on this card. The sentiment is by Amuse and fits perfectly in the 1 3/8 inch circle punch. Ribbon is from an SU mini catalog that I splurged on a while back.

Monday, March 10, 2008

Very busy birdie


I know, I know...this card is VERY busy. There's definitely alot going on, but I was so happy to be using up so many scraps and just didn't know when to stop! I just got my Pun Fun set in the mail and had to play with it right away! I did masking on the main image and then colored it in with my copics. Masking is one of my favorite techniques. It really helps your stamped images to look "grounded" instead of like they're floating on white paper. For those of you who may not know exactly how to do it, I took pictures as I was making the card. It's super easy!


First you stamp your main image on whatever piece of paper you'll be using. I used SU whisper white.

Next, you stamp the image again on a Post-It note and cut around it. I just cut off the chicks legs from the cut out image because they're solid and won't need to be colored in. It's very important that you use a Post-It note or some other paper with a low tack adhesive on the back. Also, the Post-It note paper is thinner than most paper and will make your next step come out much more even. Stick the cut out image right on top of your first stamped image.


Now stamp your next image. I used the "mega oval" from Memory Box with SU Green Galore ink.


Now peel off the Post-It note and Voila! Doesn't it look SO much better that just a chick on plain ol' white? This is also a great way to introduce a new color on your card.


Still with me? For the large scallop edge, I used my 1 inch circle punch and just stuck them onto the back of my double sided pattern paper.

A little bit of ribbon, some Stickles and clear microbeads on his belly and I'm all done!

Beautiful weather, a picnic and a dead fish...


We decided to take advantage of the beautiful Spring weather yesterday and go to our favorite picnic spot in Napa. The weather was perfect, the food was yummy and it was just a perfect way to spend the day.

When we got home I heard a blood curdling scream come from my sons room. Before I could get up, he came running into my workshop holding his beloved fish. Apparently his fish had jumped out of his tank while we were out picnicing and had totally dried out by the time we got home. My poor little guy was devastated! I asked him if he wanted to make a nice box to bury his fish in and he said yes. Ironically, the only box I had (or was willing to part with) was a sushi band aid container. My son looked at it and said, "Mom...I don't think that's funny". We covered the box with some pretty fish paper and popped the little guy inside. Only problem? My husband said that we wouldn't be able to bury it until he gets home tonight and my son keeps holding his dead fish. Every time I turn around, he's got this little dried up rubbery blue thing in his hand. Poor guy. Our fish funeral will be this evening before dinner. Check back later tonight and I'll have a new card to share with you.

Saturday, March 8, 2008

Delivering Diva


I spent most of this morning delivering all of the orders I received at my March class to the fabulous ladies who share my addiction...oh, I mean hobby! I always like to put in a special little note or surprise in each bag to thank them for placing an order with me. Here's what I slipped into my customer bags this month.

Each card is cut at 2 1/2 x 5 and folded in half to make a 2 1/2 inch square. The stripes were just scraps of patterned and textured paper that I had in my scrap bin. The sentiment is from an old retired SU set called Business Memos. I used Gable Green and Pretty in Pink markers to color the image and after I stamped it out, I thought it might fit into the Round Tab Punch. What do you know? It fit perfectly! I popped up the sentiment on dimensionals, because we all know I can't make ANYTHING without using them. I was able to get 6 mini cards out of one sheet of 8 1/2 x 11 pixie pink paper.

Friday, March 7, 2008

Kickstand Card


Here's another card I made at my club on Wednesday. I used Tempting Turquoise, Old Olive and the Bali Breeze pattern paper - love that stuff! For the envelope I used the new rub ons in the Sale-A-Bration mini catalog. I'm a HUGE fan of rub ons and thought I'd experiment a little and try something new. I used the white rub ons on a white envelope and then sponged over it with temping turquoise. I used a napkin to wipe off the ink from the rub ons and this is what was left. I really like the soft effect it left.

Thursday, March 6, 2008

Stamp Club Card


I attended my monthly stamp club last night where we made three cards using floral sets for all of them. Now, I don't normally even give a floral set in the SU catalog a second look. They're just not my style and I usually seem to go for unusual, cute or humorous sets. Much to my surprise, my last two SU purchases have been floral sets - gasp! After seeing SO many beautiful samples with Fabulous Flowers and Embrace Life on SCS, I just had to get them and see what little creations I could come up with myself.

This card was made with the large flower from "Embrace Life", wild wasabi cardstock and the Spring Silhouettes pattern paper collection. The flower was clear embossed on pale blue, cut out, "stickled" and embellished with white halfback pearls from the Pretties Kit. Super quick and simple, but the pearls really add an elegant touch.